Do you ever get those notifications on Facebook saying that such and such friend of yours was live? Facebook Live has grown immensely popular since it was first publicly launched in April 2016, but many businesses are still not using it. Read on to learn how you can get an edge on social media by incorporating Live into your marketing strategy.
Table of Contents
Why Facebook Live is worth your time
Facebook Live lets you broadcast a video to anywhere from one (1) to millions (1,000,000’s) of people and have face-to-face conversations in real-time.
Check out the first ever Facebook Live video, showing off Facebook’s new Menlo Park headquarters. That video received more than 15 million views and tremendous engagement.
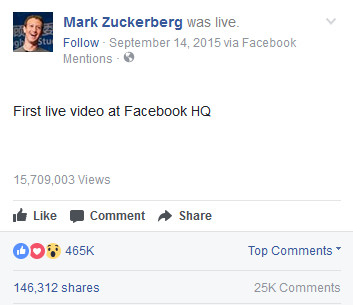
For comparison, most of Mark Zuckerberg’s videos before that only received about 1 million views each and a tiny fraction of that engagement. We see this same trend with other companies too. What does it tell us? People like live content – seeing and participating in the action while it happens. Regular, pre-recorded videos alone are not enough anymore. Facebook Live could provide a much needed boost to your social media engagement strategy in 2019.
Incorporating Facebook Live into your business strategy
How you use Facebook Live will depend on what your business does and who your customers are. One tactic could work wonders for Samsung or Apple but may not be the best option for a local property management firm or specialty retailer. We recommend that you start by creating a customer persona for your business. HubSpot has a helpful guide for this. Once you have your customer persona in hand, brainstorm Facebook Live content ideas and tactics that will resonate with that viewer profile. If you’d like some help with this, contact us at Zak & Zu Marketing.
Draw inspiration from others
When you do arrive at the brainstorming stage, it can be helpful to see how others are using Facebook Live and also what is technically possible with the tools available. Facebook has a feature called Live Map to help you discover live streams happening right now. By hovering over the dots on the map, you can preview broadcasts from all over the world. You may notice that a lot of them are from regional news stations. Be patient; there are some very creative diamonds in the rough waiting to be found. People come up with clever new content and techniques every day, so check it out at least a few times.
You can also get ideas by watching archived videos of live streams that have already ended. To find these, start by typing “was live” into the search bar at the top of your page.

Then click on “Posts” or “Videos” to filter the search results.

You can now scroll down and see who was live recently. Check out a few videos and identify what those people did well and what could be improved upon.
How do you go live?
Okay, so you have a killer idea for a Facebook Live event. How do you get started broadcasting it? The easiest way is to use your mobile device (smartphone or tablet).
Follow these simple steps:
- Download the Facebook app from the Google Play or Apple Store.
- Log into your Facebook account, and go to either your news feed, your company page, a group page, an event page, or a friend’s page. Wherever you choose to go, that’s where your live video will appear for others to see. We recommend your company page in most cases.
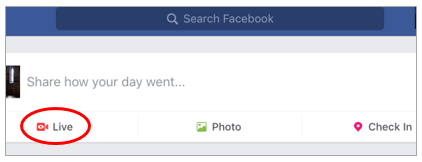
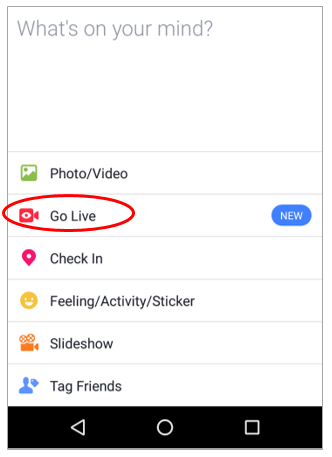
- Find the status (or comment) boxat the top that says something like, “Share how your day went…”, “Write something to…“, or “Want to share an update…“.
- Look for a red button that says “Live”, “Go Live”, or “Live Video”. Click it. You may need to click inside the “Share how your day went…” box first before it expands to show the button.
- Facebook will ask for permission to access your camera and microphone. This is required to use Live.
- You will see a short video tutorial on the screen. You have the option to skip it if you would like.
- On the following screen, you will be able to preview the video feed (exactly as viewers will see it once you are Live). Test out multiple angles to get an interesting frame for your shot. You may want to get a tripod so that you don’t have to hold your device the entire time or end up with a shaky video.
- Now that you have framed your shot perfectly, let’s look at some of the tools and options that are available to you in Live.

By clicking the circular arrows on the top right, you can switch between your front facing and main cameras. Your main camera will generally provide higher quality video. However, you may want to use the front-facing camera so that you can see what’s happening on the screen and read comments as they come in.
The wand icon on the top left opens a sub-menu that includes visual filters (like those you find on Instagram and Snapchat), the ability to adjust brightness or flip the image, and a set of markers for drawing on the screen.
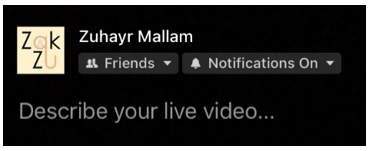
At the bottom, below your name, you can choose privacy settings for your broadcast. By default, it is set to “Friends”, which means that only people who are Friends with you on Facebook will be able to access your stream. Customers oftentimes ‘like’ your Page instead of friending you directly. So you will probably want to set this to ‘Public’ in order to reach all of your Facebook fans.
Keep notifications turned ON so that you are alerted when someone writes a comment or poses a question during your live stream.
Below that, you will see “Describe your live video…”. Add a few sentences to help potential viewers figure out what your stream is about and whether it may interest them.

The heart icon at the bottom allows you to place a ‘donate’ button in your live stream. By clicking on the icon, you can choose from among many registered nonprofits to direct your viewers to. This is a great feature if, for example, you are hosting a benefit event for a charity or are a nonprofit organization yourself conducting a fundraising campaign.
![]()
The “X” on the top left will close Live.
- Once you are happy with your settings, click “Go Live” at the bottom right and have fun interacting with your fans!

- When your event is over, click “Finish”.
Facebook will then give you the option to 1) delete the live stream or 2) archive it as a video that people can watch later. Unless the event went horribly wrong, it is a good idea to save it and make it available for those who were not able to tune in live. That way, this one piece of content can continue to work for you even after the initial live show is over.
Using professional equipment for better quality
You may need better production quality than is possible using a smartphone or tablet (i.e. higher resolution, multiple camera angles, etc.) Thankfully, in January 2017, Facebook added the ability to live stream from your computer using professional equipment such as DSLR cameras (or even a drone), external microphones, and professional broadcasting/encoding software.
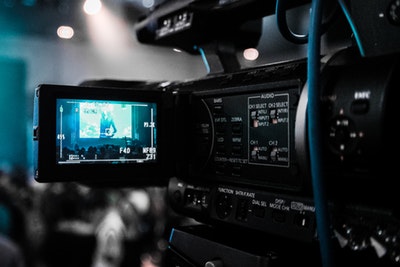
You can start a live session on your computer using ‘Publishing Tools’ on your company Page (look under ‘Videos’ and then ‘Video Library’) or through this direct link.
Check out this helpful how-to guide from Facebook to get you started.
If you decide to go this route, you will also get access to some more advanced features. For example, you will be able to embed your live stream on another website (which is an excellent way to drive traffic to your company site). Facebook also recently started allowing you to Go Live with a guest or friend. With this new feature, you and a friend can broadcast together, having two video feeds appear side-by-side or as picture-in-picture. This is especially useful if you are conducting an interview or have employees on remote teams. Just share your stream key with the guest, and you’re ready to go.
Helpful tips
- Promote your live eventfor at least 1-2 weeks beforehand to ensure that you have a great turnout.
- Choose a broadcasting location with a strong internet connection. You don’t want the stream to cut out during the best part due to poor WiFi.
- Turn your phone’s ringer and text/app notifications OFF so they don’t disturb you during the live stream.
- If this is your first time, do a test run beforehandto familiarize yourself with the tools and Live interface. Ask a friend to comment on your live feed and see what it’s like to carry on a conversation while filming.
- After your live event, edit the video. You can add tags (which make it easier for people to find your video), select a custom thumbnail, and more.
Now it’s time for you to put these ideas into action for your business. No matter your budget or prior experience with Facebook, give it a try!

